Tuesday, July 6, 2010

How to Add a Comment to a Blog

My mother mentioned that it can be a little tricky adding a comment to a blog. To make things a bit easier, I'm posting some step-by-step instructions on how to post a comment to someone's blog.

How to Add a Comment to a Blog
1. At the bottom of each entry, there is a bar that has information about when the entry was posted and how many comments other people have left on the entry.

 
2. Click on the text that says how many comments have been left on the entry.


3. Clicking will take you to a page with just the one entry on it and a text box. You can also see what other people have written.


4. Type what you would like to say into the text box.


5. Once you have typed what you want to say, click on the drop-down menu next to the text that says "Comment as:". This will give you a list of ways for you to post. If you have an online identity (such as a blog of your own), feel free to comment that way. You will be prompted to log in by a pop up window. If you do not have an online identity or do not want to use it, select either Name/URL or Anonymous.


 **How to choose which method of posting** 
If you select Name/URL whatever name you type in (see next step) will appear above your comment. (Mary says... [your comment]). If you select Anonymous, no name will be given above your comment. (Anonymous says... [your comment]).


6a. If you selected Name/URL, a window will pop up prompting you to enter your name and your URL. (URL stands for "Universal Resource Locator" and is the web address that you type in to the address bar at the top of the window to get to a website). Enter in whatever name you want to appear on the post. You can also put in your website address if you have one or you can leave it blank. Click continue.


6b. If you selected Anonymous, you do not have to type anything.

7. If you want to see what your comment will look like before posting, click Preview.

8. Once you are done reviewing your comment and have selected a method of posting, click Post Comment.


9. You may be prompted to type in the letters that are shown to you in an image. If so, type the letters in the picture, keeping in mind that they are case sensitive. This is to make sure that a computer robot isn't spamming the blog.

That's it! You're done! Comment successfully posted.

Saturday, July 3, 2010

Breaking News: Boyfriend Scores Brownie Points with Girlfriend and Girlfriend's Landlord

My boyfriend, Curtis (that's him, over there on the right), is currently employed by Home Depot and works in the flooring department where he has been awarded a Homer Award, not once, not twice, but SIX times and has received a Certificate of Appreciation from district management. In other words, he's pretty awesome. But yesterday, he earned some serious brownie points.

First, some background. I am moving into this really nice apartment. The lease is signed, my parents' furniture has been sorted and selected for transfer to my house, everything is pretty much ready... except for the apartment itself. The landlords are renovating it; that's part of what is making the apartment so nice. And, when the plan was to spend the summer at my parents' house in the greater Seattle area, not having an apartment for 3 months wasn't a problem. It wasn't a problem until I got a really great internship working at a library out here in Walla Walla. So, the landlords are scrambling to get the apartment done as quickly as they possibly can (it looks like the move-in date is July 30 now! almost a month earlier than initially planned!), I'm crashing in my friend Becca's room, but since my all of my stuff is just going to have to be moved out again, everything I own is in her dining room.

How does Curtis (over there on the left wearing a hat I made him last winter) fit into this bizarre housing situation? My  landlord, John, met Curtis at Home Depot because he needed tile to finish the shower floor. Unfortunately the Walla Walla Home Depot only had half of the amount John needed so Curtis put in a transfer request and John left happy after being assured that the tile would be there on Thursday.  The Home Depot in Lewiston, however, failed to transfer ALL of the flooring department transfers. What does Curtis do? Aware that John is my landlord and that any delay in construction means continuing discomfort for me, he calls John and offers to go pick up the tile and deliver it.

So, yesterday, Curtis takes me to Richland and we head into the Home Depot and pick up the rest of the tile. We complete an over-the-phone purchase for John and sequester the tile in the trunk of Curtis's car. John is happy and quite impressed with Curtis's dedication to customer service and determination to get me into my own apartment and out of Becca's dining room.

And then! The part that makes this story relevant to a knitting blog. Since we were in Richland anyway... Curtis took me to Knitty Gritty! Tremendously exciting. He even looked through some knitting books and felt some yarn with me. We picked out the type of yarn that will be used on that massive blanket (with the cables and the tree in the middle) and I bought some yarn for a tank top and for an early fall beret thing I'm planning. See the pictured yarn below...

Nuna by Mirasol in a silvery grey blue
40% silk, 40% wool, 20% bamboo

Ultra Pima by Cascade in a dark red
100% pima cotton
This yarn really is more red than purple but I kinda failed at the picturing taking part... below is picture (not mine) from Ravelry that is much closer to the actual color. Imagine the purple mixed with the red below and that's probably closest.

And then, as if that wasn't enough, he took me out to lunch to this amazing teriyaki restaurant, Woo's Teriyaki. It was delicious. It was so good, Curtis mentioned that maybe we could go all the way back out to Richland just to have lunch... but maybe we could go back to the yarn store so we would could get more done in one trip. Excellent!

After lunch, we headed back to Walla Walla and dropped the tile off with John just in time for him to finish up the shower. He is so pleased with Curtis that he is going in to the Home Depot to find a manager and tell them what a great employee Curtis is.

So all around a pretty good day!

Saturday, June 26, 2010

Pillows, Slippers, Sweaters, and the Future!

Cabled Pillow
I have finally blocked the squares for the cabled pillow! Not only that, but today I purchased some fabric to back the knitting. That means that I only need to sewing the fabric on (sewing machine... a new acquisition!), sew the sides together (yarn and tapestry needle), and stuff it with fluff! This is tremendously exciting.

I intend to sew it on tomorrow or Monday evening and then later in the week head to Jo-Ann’s (oh, that wonderful place of bliss, contentment, and superior, speedy customer service…) to buy some fluffy stuff to stick inside. 

I’m not quite sure how big this pillow is going to be though. Blocked, the squares come to 12” x 12” and stuffed, they’ll be even a bit smaller. I’m going to make the second pillow (of my own hair-brained design) larger and hopefully they will look like a big-pillow-small-pillow set. It is that outcome for which I go! This second pillow will be basically a square from the quilt design I was considering making using these cabled pillow squares.

The pillow will have a small white square in the middle with a leaf design and a brown border with ... some other sort of textural pattern. The back will be just plain brown in whatever textural pattern I come up with. I'm thinking maybe diamonds.

Trivia from the KnitWit Duo:
Which Harry Potter characters like to spend their free time knitting (for charity or otherwise)? Scroll to the bottom of this entry for the answer!

French Press Felted Slippers
I've knitted all of the slipper pieces. Using size 15 needles made the project go unbelievably fast even if my hands did get tired from holding such large needles. The pieces look pretty funny and they are really large since they'll shrink when I felt them. I actually completed the pieces a while ago, but have been kinda nervous to sew them together.


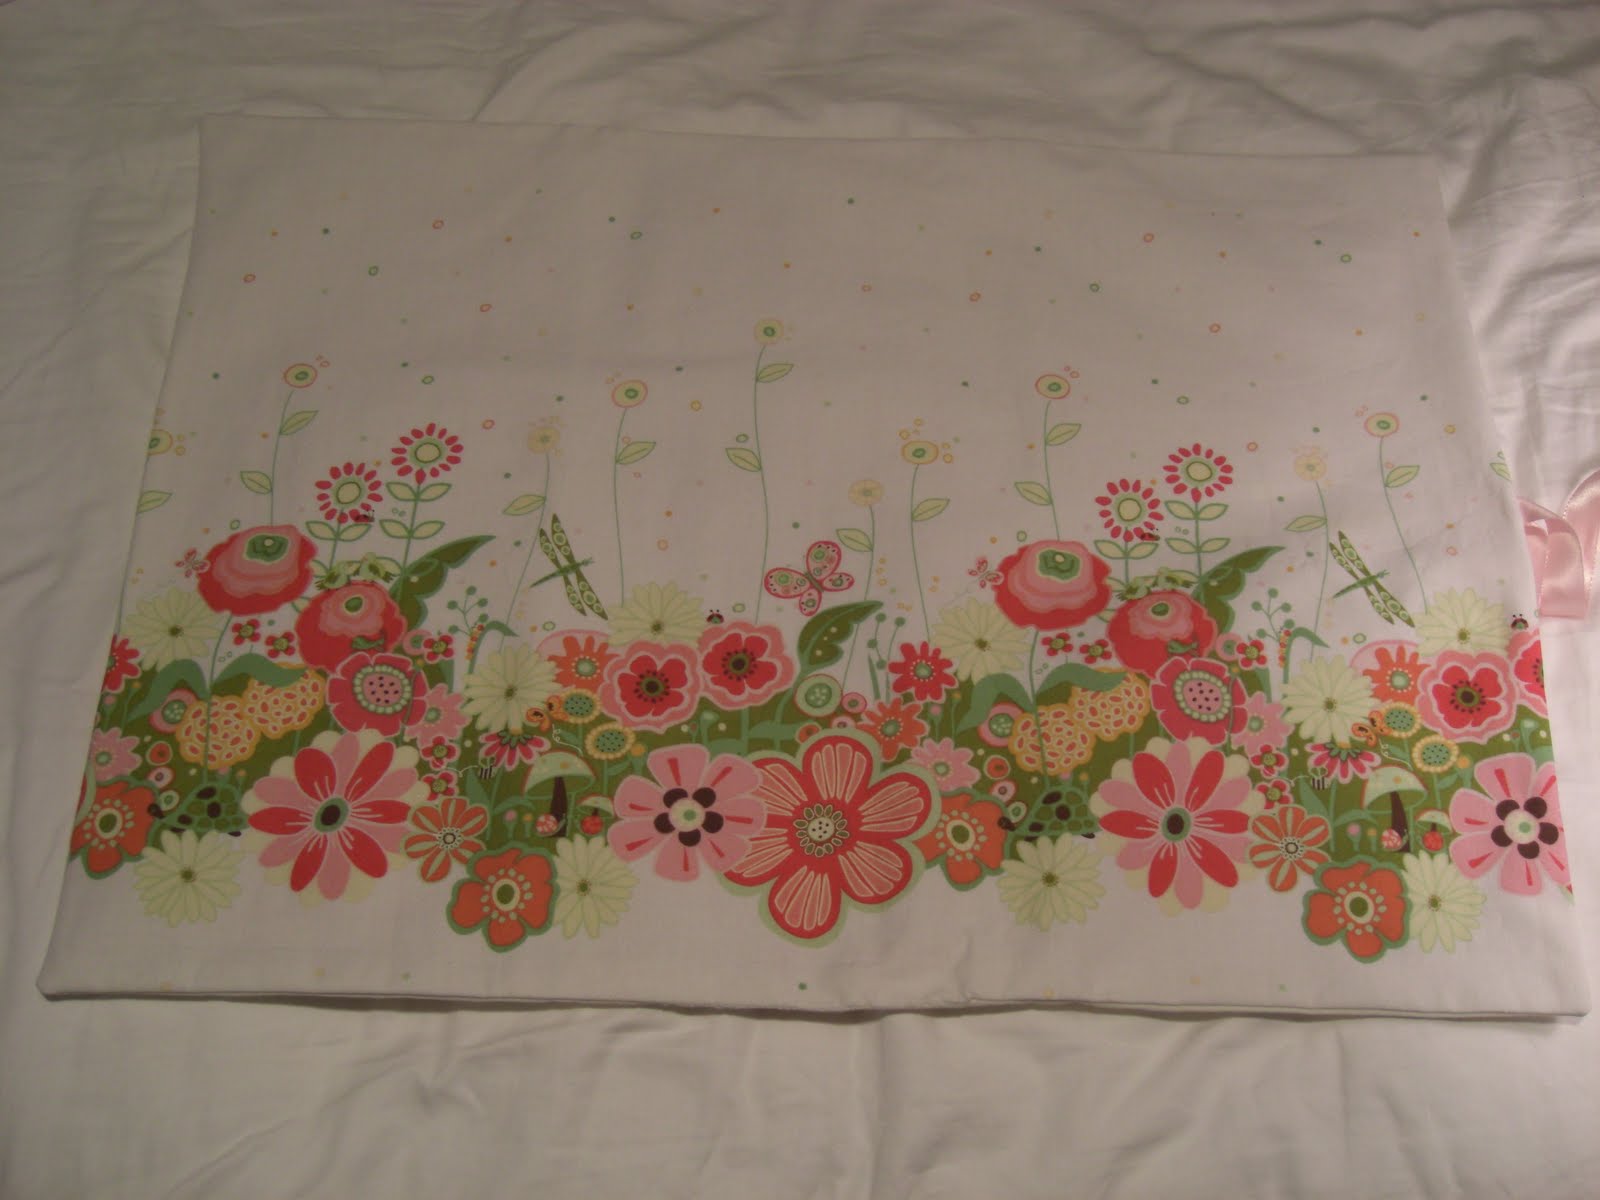
I'm not so much nervous about sewing them together as I am about felting them. I've never felted anything before -- I generally don't even like things that are felted. If I mess them up (if they felt and shrink so they're too small, for instance), it really isn't a big deal. I did some wildly inaccurate arithmetic and bought way too much yarn for the slippers so it's not like I'd have to buy more if I messed them up. I just like to get things right the first time. But I've decided that I'm just going to do it! Next week. I need to find an extra doesn't-mat ter-if-it-gets-ruined pillowcase first. I think I found one (it's Curtis's from his freshman year... and it's been sitting in storage boxes for at least 3 years now) but before I destroy it accidentally or, you know, cover it in irremovable green fuzz, I need to check with him to make sure it's okay.

I also need to buy some cute buttons for on the flap of the slippers. Buttons! I love buttons and buckles. Not such a fan of tassels though.

Sweater Vest for Jack
Well, this is it. This is the first time that I'm going to knit something that actually has to fit someone. I'm going to make Jack (my grandfather) a sweater vest. It has a textural argyle pattern in the front, a twisted rib on the back, and will be a lovely navy-greyish blue. I've traced an outline of a sweater vest he owns that fits well and I'm going to try to knit that same shape. We'll see how it goes. I've purchased the yarn (while in Ashland celebrating my grandmother Jackie's birthday with some Jane Austen and dinners out on the town!) and I have the pattern. It's from the same magazine that I got the pattern for Quinn's birthday beret. This time, I will be sure to check my gauge.
I will be leaving the leaves off.. not only do I not know how to do Intarsia or Fair Isle style yet, Jack doesn't really wear patterns like that anyway. So, if you can't tell by the pictures here, go ahead and click on the image and you should be able to see the textured argyle. So. That's the plan. I'm planning on contacting the magazine to see if, when I finish, if I can mail in to get a puppy too.


The Future!
I have all sorts of things planned for the future. Step 1: finish outstanding knitting projects (pillows, slippers). Step 2: finish outstanding SEWING projects (notebook covers, bag). Yes! That's right! You heard me! Sewing projects! I've been learning how to sew this summer at a local store called Stash. I have a new sewing machine (Bernina 1080 from my lovely mother and Judy Barlup) and I've been stitching away! I'll be starting a second blog soon... pretty much as soon as I come up with a name, really. That site won't even have the promise of tutorials though since I don't think I could teach anybody anything. But in case you're interested... here's one of the projects that I've done. This is the first thing I've made entirely by myself and I made it using cheap fabric (I didn't know there was really a difference between fabric quality), but I'm still disgustingly pleased with myself. I'm working on making notebook covers for some of my friends.
I have no idea if they'll use them, but at least I'm getting practice sewing. Well, I don't know if Quinn and Alixandra will use them. My friend Lauren has requested some and we're going to pick out fabric together so I'm pretty sure she'll use them. Anyway, the clear plastic pocket (for course name, or owner's name, or whatever) was my addition. Also, please note the pencil pocket on the inside.

I've also made a sling bag (Birdie Sling by Amy Butler) and the class I went to today taught the Grommet Hipster by Indygo Junction and I'm almost done. Indygo Junction, funnily enough, is located in Kansas City, Missouri. Even if you move away, it seems you never actually leave. While I was in Jo-Ann's, there was a woman with her granddaughter from Overland Park, Kansas and I resisted the urge to run up and say hi, but it took a lot of strength.

Anyway, to check out what I'm working on or if you're a sewer, you should visit http://www.MySewingCircle.com. My user name there is KristineMarie.

Other News
I would like to point out, especially to any concerned relatives who may or may not watch shows such as Law & Order: SVU, that it is a Saturday night and I am updating my blog about knitting.

Answer to KnitWit Trivia:
Albus Dumbledore spends time examining knitting magazines; Mrs. Weasley always has a sweater or several ready for reluctant sons and Harry of course; and, Hermione ensures the warmth of House Elf heads by knitting charity hats!

Saturday, June 12, 2010

How to Make a Blocking Board

Sometimes things just don't turn out like they should - or the shape and size you want or need them to be. This is when blocking comes in handy. Blocking allows you to make adjustments to your knitting by stretching and shaping. There are three different types of blocking: wet blocking, spray blocking, and steam blocking. The methods vary as to the amount - and form - of water used to relax the fibers and allow you to reshape them and which method you use should be dictated by the type of fiber with which you are working.  I chose to make a pair of blocking boards that way I could move my projects out of the way and have the option of pinning them into shape.

I got the general instructions on how to create a blocking board from Knitting.com. Click HERE for the full article from Knitty.com. Also in that article is a useful guide to which blocking method you should use for which fibers.

I know at first glance the pictures seem small, but if you click on the image, it will show you the full sized picture.

How to Make a Blocking Board


Materials (for two total):
Picture Item
2 Sheets of 2' x 2' Drywall (1/2" thick)
Sturdy tape (such as duct tape, linen tape, or electrical tape)
I used Res-Q Tape because I went in search of linen tape at Jo-Ann's and couldn't find any. The Res-Q Tape is double sided but when you only use one side, the paper on the other is nice and thick and the tape is pretty strong so it worked out. Just use whatever type of tape you think will help keep the edges of your board from crumbling.
2 yards of 1" gingham fabric
The grid on the fabric will make a useful measuring tool for when you block. The only 1" check I could find was light pink which showed up okay, but I would have preferred a blue or green.
Staple Gun
The staple gun I used was recommended by my mother who, like myself, has small hands, but - unlike myself - does upholstery. She needed a staple gun that actually worked but was easy to handle and not so large that she couldn't get it into the places she needed to staple. Relatively inexpensive (approx. $10), the Easy Shot was her first pick. After using it, I have no complaints other than a lack of more things to staple.
5/16" Staples
Make sure your staples will work with your staple gun.

Directions: 


1. Using your sturdy tape, tape around the edges of the squares of drywall. This is to help reinforce the edges and prevent the edges from crumbling.

2. Put extra tape on the corners of the drywall. Like knees and elbows, corners frequently get banged around and bumped into so, while this step isn't strictly necessary, I wouldn't skip it.

3. Iron your fabric! This is important so you don't have any bunches of fabric or wrinkles that will keep your blocking board from being a smooth surface.

4. Spread your fabric out on a smooth, hard surface and place the drywall on the fabric. Make sure the line the top and left side of the drywall up with the lines of the gingham. This will ensure that the grid pattern is straight and will make it a more useful measuring tool.


5. Once your drywall is in position, cut the edges of the fabric so there is a 3" border around the drywall.

6. On one side, fold 1" of the border in towards the drywall. Pin in place. Be sure to place the pins in such a way that when you staple the fabric down, you can still remove the pins. You do this so the cut edge of the fabric is tucked inside and won't fray. If you want to be extra certain that it won't fray, you could also use a product like Fray Check along this edge.

7. Fold the pinned side of the fabric onto the blocking board. While holding the fabric taught but still, staple in place. I stapled about two inches apart along the whole side.

8. Repeat steps 6 - 7 for the side that runs parallel to the first completed side.

9. For the two remaining sides, repeat steps 6 - 7 ensuring that the corners are folded neatly, like a package. To do this, make a triangle in the corner with the fabric. This should help keep the fabric from bunching or being too messy around the corner.


Once all sides have been stapled, you're all done!

Sunday, April 25, 2010

Decision!

*If you would like to receive e-mail updates about this blog, please send an email to knittinsmitten@gmail.com! Thanks!**

I have decided! The cabled squares that were being considered for either pillows or a quilt will be pillows. I've finished one side of one of the pillows, but need to get more green yarn for the back. I'm really quite nervous; this will be my first adventure with dye lots. I'm hoping that they'll match up well enough that you won't be able to tell. I'd be so frustrated if the front and the back of the pillow looked really different.

I am still going to need to block this side though. The edges are a little curly and I'm pretty sure that it will be MUCH easier to make the pillow if both sides are the same size and lay flat.

I've purchased the materials needed to make a blocking board and I'll be posting soon with a 'how I made my blocking board' tutorial.


Potholders for Curtis
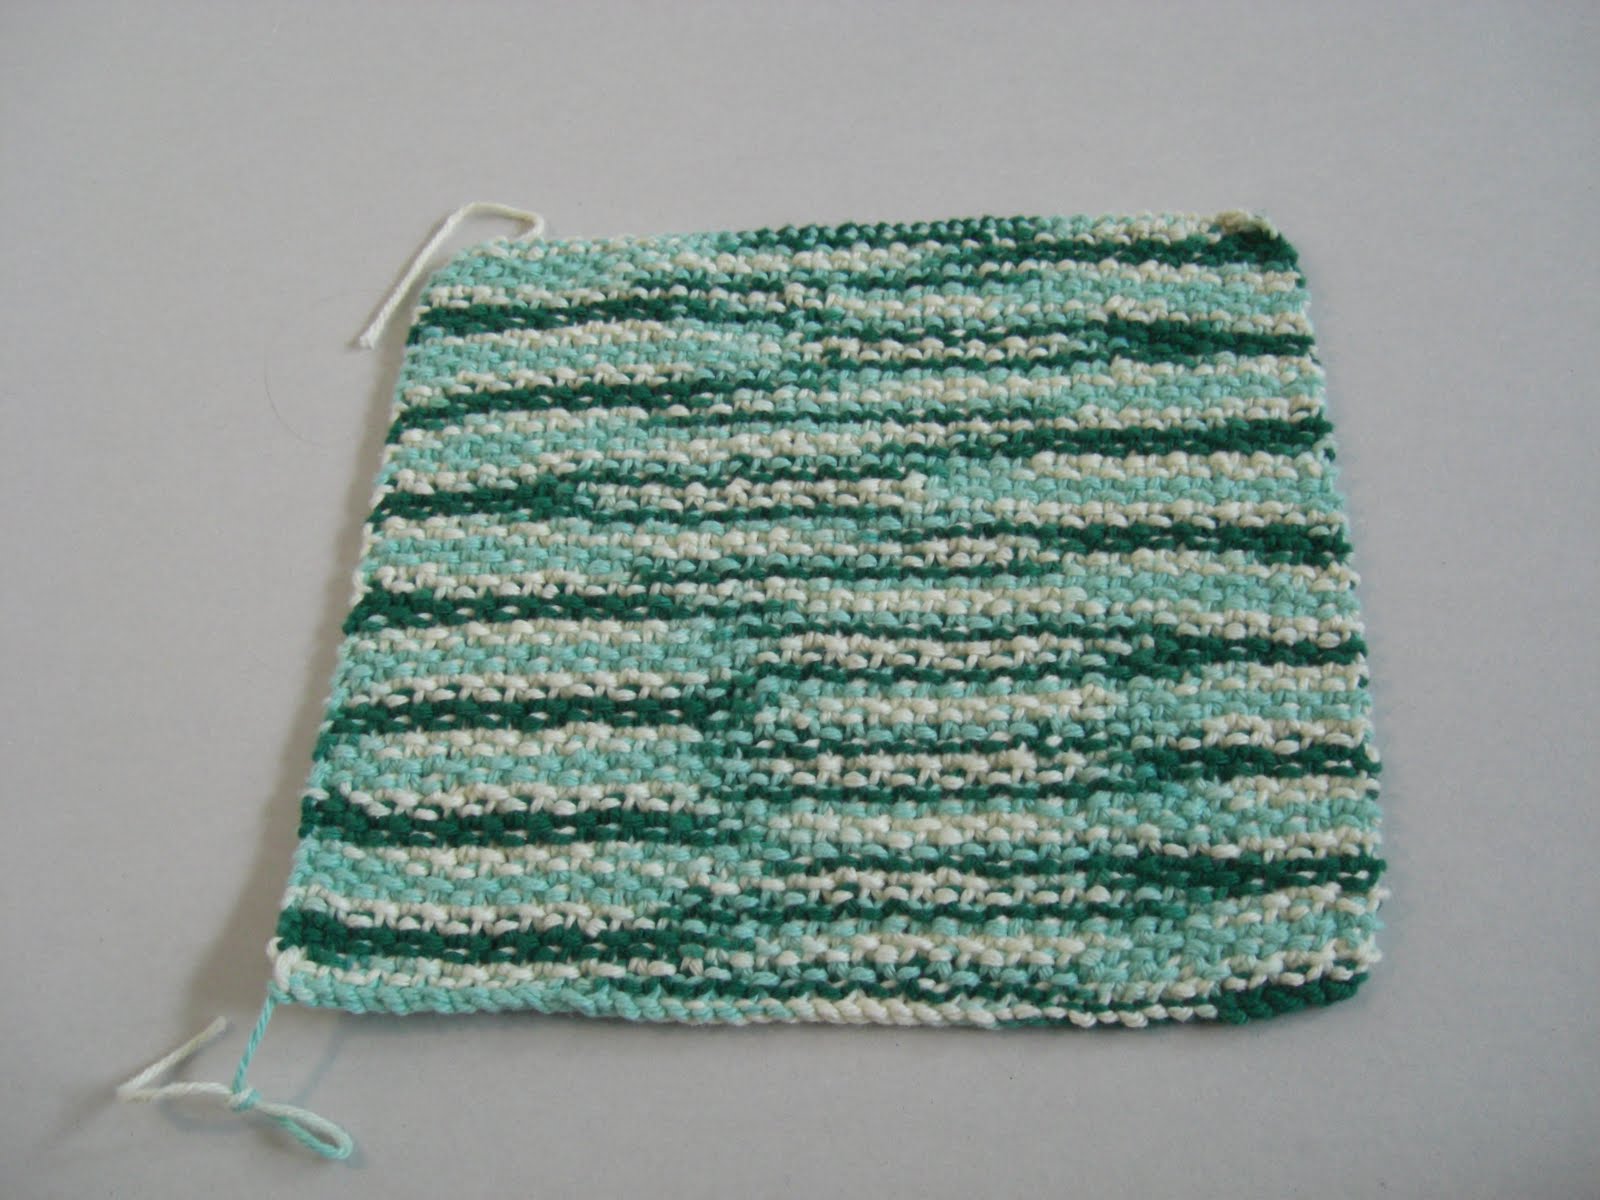
I've also been working on some potholders for my darling boyfriend, Curtis. I've discovered that for him to get things out of the oven, he has been using a mix of dish rag and paper towel. To protect his fingers and reduce fire hazards - as well as for the direct benefit of my mental health - I'm making seed stitched pot holders out of a variegated, 100% cotton yarn. 45 sitches across and 59 rows long. I'm making two squares and will then whip stitch them together. I've already finished one square and have made significant progress on the second. Only 18 more rows!


SEED STITCH
To make a seed stitch, cast on an odd number of stitches.
Then, *knit one, purl one* and repeat until you have one stitch left. Knit that stitch.
Repeat that row until you have the desired length.

CO #odd
Row 1: *K1, P1* Repeat ** until 1 stitch remains, K1
Row 2 and on: Repeat Row 1.

To make the same potholders I am:
Using US size 8 needles and 4 ply worsted weight 100% cotton yarn...
CO 45 stitches.
Row 1: *K1, P1*  Repeat ** until 1 stitch remains, K1.
Rows 2 - 59: Repeat Row 1.
BO purlwise.

My grandma sent me this image. It's a magazine cover from Good Housekeeping and it's quite old (from 1918!). She and I were thinking that maybe I could make prints of it and sell them. I'd touch it up a bit (center it and make sure it had a nice background) and print it on nice card stock or a heavier paper. Do you think it would sell? And if so, for how much? Either way, it's very cute!

For future projects:
I do still plan on making a blanket for the living room. I've decided on the pattern "Yggdrasil Afghan" by Lisa Jacobs (see Ravelry link HERE). In the center there are four trees whose branches are entertwined and their roots lead down to some really fantastic looking cables and leafy-vine designs. It's a pretty large blanket though and will require a lot of yarn and a lot of patience. (The image is from Ravelry and is probably under copyright.)


Also, for my BRAND NEW APARTMENT (woo!) I am going to be making a bunch of house slippers since the floors are painted concrete. The slippers I've found are called French Press Felted Slippers. They are, as the name implies, felted and represent the first and so far only felted project that I've liked. They are little ballet type flats with a button! The pattern from Ravelry can be found HERE. (This image is also from Ravelry.)

Since it looks like the slippers will knit up pretty quickly, I'm thinking I might make a variety of colors and, more importantly, use a variety of cute buttons! I really like buttons and buckles so these will just be great.


**If you would like to receive e-mail updates about this blog, please send an email to knittinsmitten@gmail.com! Thanks!**

Thursday, March 25, 2010

Waffling

**If you would like to receive e-mail updates about this blog, please send an email to knittinsmitten@gmail.com. Thanks!**

This past month has certainly been a busy one! I've finished mid-terms (barely) and made it home for spring break. I've been trying to find housing for next year (harder than you might think!) and a summer internship that pays (about as hard as you think) and a summer job (I'm applying to some knit and craft shops on the East side of Lake Washington) and trying to get some work ahead done for my classes. That being said... I've completed Alixandra's gauntlets (see previous post), almost finished one side of my current project (see below) and mom and I finished my knitting needle case (also see below)!

Alixandra's Spiryogyra Gauntlets - Complete
They turned out nicely, I think. Unfortunately, I got them done and gave them to her just as Walla Walla is warming up so I might have to wait until next fall to see her wear them. Pictures then.

Cabled Pillows (?) - Current Project
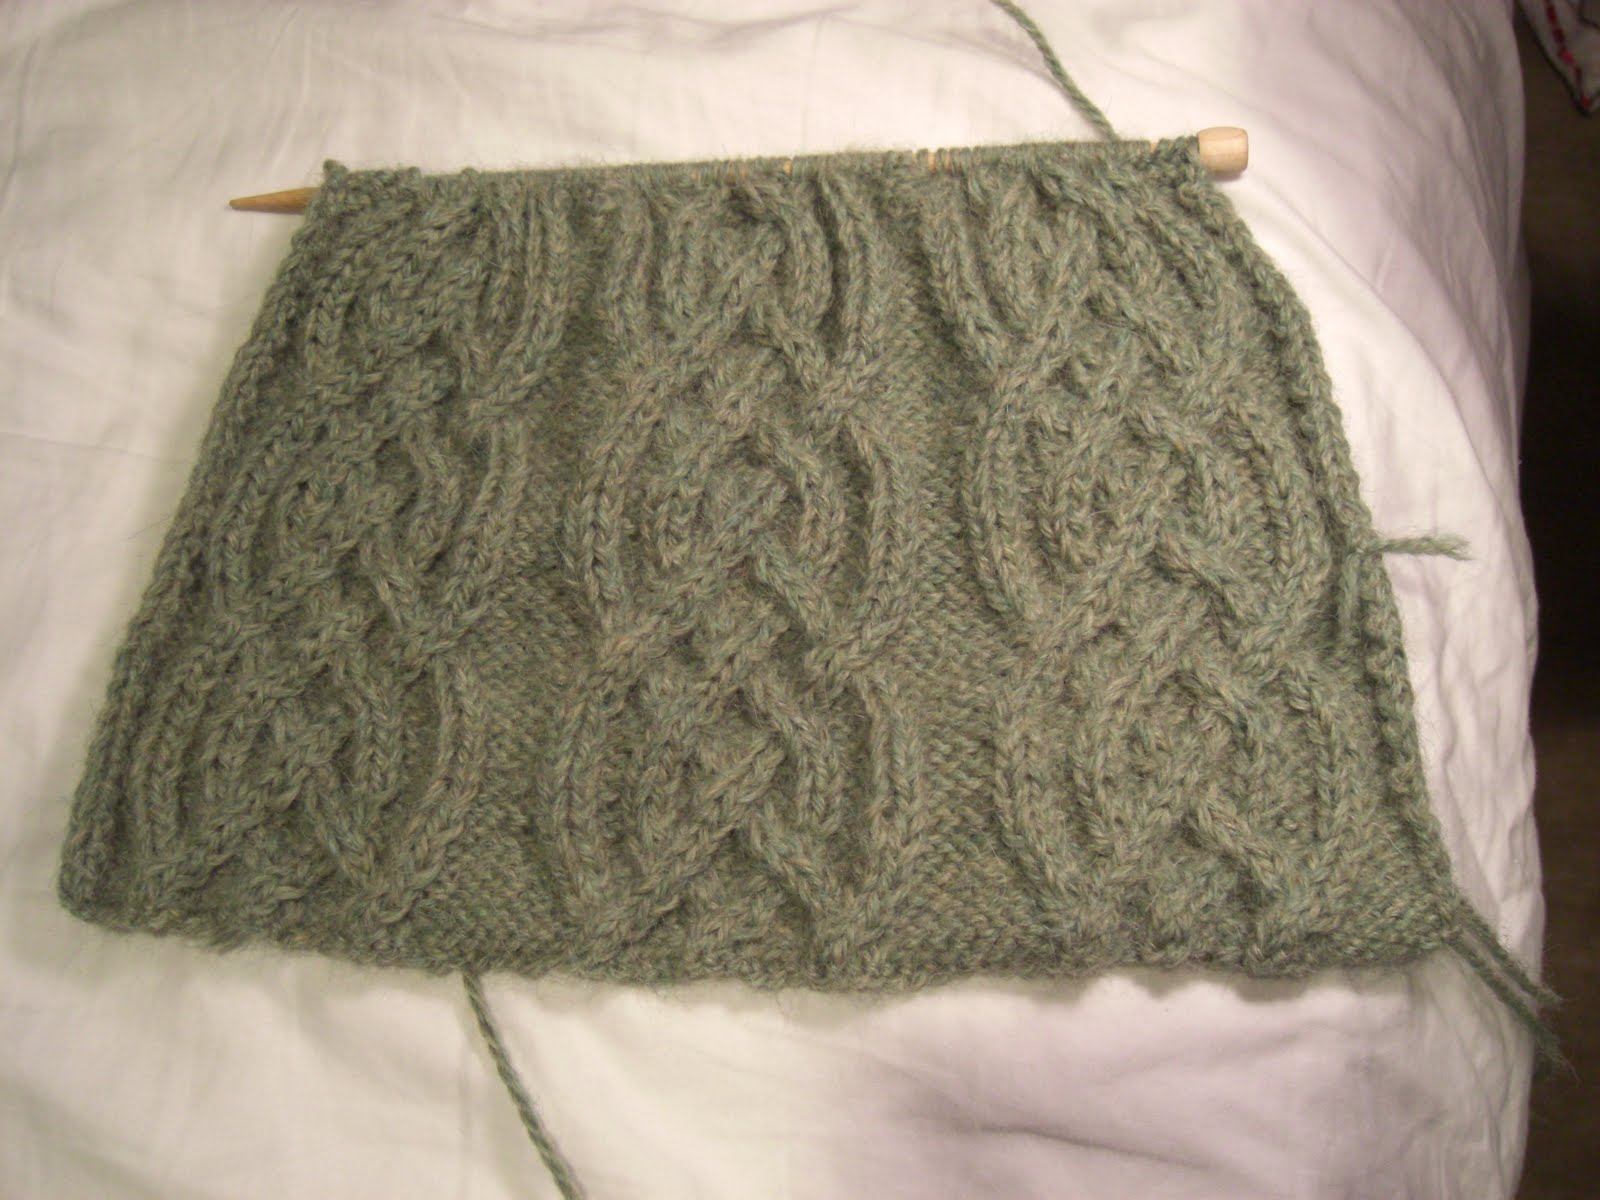
Right now I'm making pillows! Basically, I'm going to knit two roughly 14x14" squares (when blocked... my edges are curling) and then line them and then sew them together and then stuff them. That is my incredibly vague master plan. I don't know if pillows actually work like that. But I'm not sure about the whole pillow idea. The picture here on the left is what I've done so far. I like the pattern and I really like the yarn - it's the Suri Merino that I got on my yarn quest mentioned in THIS POST - but I'm not sure about the pillows. I'm worried they won't look very contemporary. And I don't want to do all this work for non-cool pillows.

Here's a close up of the pattern I'm making. It's called a Saxon Cable. It's pretty easy. The first set was a little confusing, but once I saw the pattern (when you're at this spot in the fabric, the cable needs to turn in, so it makes sense to move the purling to the right, etc.) it went a lot faster. I think I'm going to put on one more repeat of the pattern (17 more rows) and then see how close to being square it is. I might need to put on 5 total though.

But since I'm worried about the pillows turing out sorta lame, I'm thinking about making the squares into a little quilt. This presents several problems:
1) I have to buy way more yarn. I mean, way more. It looks like just one side of a pillow is going to take more than one skein so I'll already have to buy more just for pillows. (I have 2 skeins of green... all they had, 4 skeins of brown, and 4 skeins of white/beige).
2) This is going to be way more work. As in, possibly infinite never finished project that sucks my soul away leaving me a worthless husk of miserable knitting-ness.
3) The pillows (or quilt) are going to be living at my boyfriend Curtis's house. I haven't talked to him to see what he thinks of the pillows so far. I was going to talk to him about it when I go back to Walla Walla at the end of the week. I don't even know if he *wants* a blanket for in the living room. I don't know if he is going to be worried about the pillows not being up-to-date enough.
4) I don't know how big to make the quilt! If I do the pattern I've drawn (see image on right above) the blanket will be about 3.5'x3.5'. I guess that's okay for a little lap blanket, but I don't really like little lap blankets. I want to be able to curl up under a blanket. But I really like the design I've made. The green squares would all be the same saxon cables; the little squares inside the larger ones on the outside would be this neat leaf pattern I've found; the smaller squares on the inside would be some sort of pattern I haven't decided on yet. I could make it bigger (think closer to 4'x5') but then that messes up my design unless I make it HUGE, which I really don't want to do.
5) I don't know if a quilt is less lame than pillows. It might be just as lame but with more work.
6) I need to find the same dye lot. This is problem no matter what. Uggggh. I thought I bought enough... I'll have to call Jacci's Yarn Basket and see if she has anymore. If not, then I guess I'm on the ultimate yarn quest.

Knitting Needle Case - Complete
The knitting needle case is complete!!! Hooray! Mom did most of the sewing (well, okay all of it except for the hand sewing) and it turned out awesome. Brace yourself for picture show!

In progress:


Complete and closed up:

We're still deciding on ribbon length. They won't actually be that long.

Opening...:


Open:


With the flap up:

Without a flap, you run the risk of having your needles slip out. A very sad event indeed.

The oustide when opened:


All sorts of details and close-ups:

One of two zippered pockets. This one has a clear window in the front of the pocket so you can see what's inside!

Very cute butterfly applique! Also, please note the hot pink top-stitching.


Needle pockets! There are 15 slots for double-pointed needles (pictured) and 15 for straight needles. Again, note the hot pink top-stitching.

Thanks Mom!

Library Updates!
I've decided to do little reviews of the knitting books that I own (or are considing owning) and like at the end of each post. Usually it will be just one book, magazine, pamphlet, what have you at a time. Also, if it's available on Amazon for you to purchase, I'll put a link up.

I've added a book to my knitting library. Romantic Knits by Jennie Atkinson is really lovely. There are a bunch of really cute designs and patterns in here. Atkinson designed the beret that I made for Quinn's birthday. The design on the cover is her Butterfly Dress and I have every intention of making it eventually. There are also some lovely robes and some cute slipper socks.

The pictures are full page and full color. The book itself isn't particularly easy to carry around - it's pretty big. The instructions look easy enough to follow and there is a useful guide in the back of the book. What caught my eye in that guide was a little article on different finishing techniques you can do on the edge of your garments. I would definitely recommend this for a confident knitter.

***

I've also checked out Sock Innovation by Cookie A from the school library. I'm debating whether I should buy it or not. It has a lot of really useful information on how to make socks and (even better!) design your own. The patterns in the book are interesting, but I'm worried for someone who has never made socks (and has never had to turn a heel... or shape anything really...) that they might be too hard. It would probably be a good one to get though. I'm just not sure.